
Canva: Create Design Autofill Job(Action Event)
Please follow the steps below to create an asynchronous job to autofill a design from a brand template for the above-mentioned action event:
Please follow the steps below to create an asynchronous job to autofill a design from a brand template for the above-mentioned action event:
- Use Case: To create an asynchronous job to autofill a design from a brand template for your Canva account.
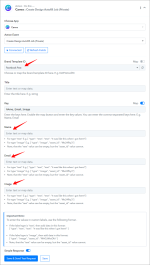
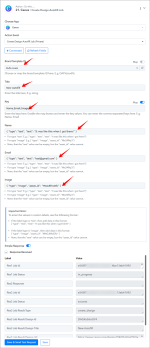
- Select "Create Design Autofill Job" as an action event, connect your Canva account, choose the connection type (either new connection or existing connection), and click the "Save" button (For help with authorization, check out the "How to authorize Canva in Pabbly Connect?" section.)
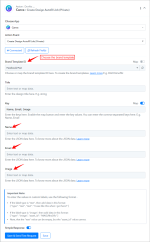
- Choose the "Brand Template ID", and enter the "Title".
- Enter the Key values. To enter the Key values enable the map button, and remove the text written in the "Key" body parameter.
- Enter the label names in the "Key" body parameter that you have created in your table in your Canva account, E.g. "Name", "Email", and "Image".
To create the table in your Canva account, follow the below steps:
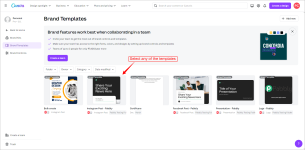
Note: To use the "Autofill" feature in Canva, we must have an enterprise account. - On your Canva dashboard, navigate to the "Brand" section, and click "Brand Template".
- Choose any of the brand templates or create a new brand template by clicking on the "Add new" button.
- Click on "Elements", and add "Charts", "Tables", "Frames", "Grids" and "Mockups" according to your requirement.
- In the "App" section, search for "Bulk Create" to create an autofill table.
- Click on the "Enter Data Manually" button to create an autofill table and add labels.
- To add labels to your table, click on either the "Add Text" or "Add Image" buttons. Click on "Done".
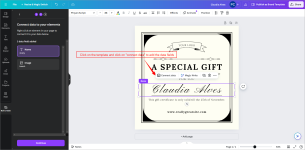
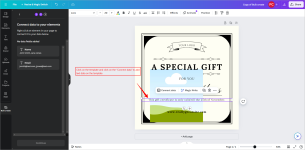
- To add labels to your selected template click on the template and click on "Connect data" and choose the labels.
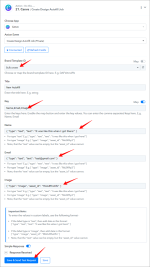
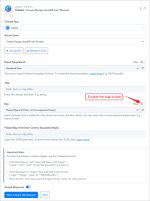
- If the label created in your table is type "text" then, add data in this format:
E.g. { "type": "text", "text": "It was like this when I got here!" }
The "text" value can be empty. E.g. { "type": "text", "text": "" }
- If the label created in your table is type "image" then, add data in this format:
E.g. { "type": "image", "asset_id": "MAJtrdfsf" }
The "asset_id" value can not be empty. E.g. { "type": "text", "asset_id": "MAJtrdfsf" }
Attachments
-
 Autofill4.png156 KB · Views: 111
 -
 Autofill5.png153.2 KB · Views: 106
 -
 8.png261.4 KB · Views: 100
 -
 16.png232.6 KB · Views: 102
 -
 16.png232.6 KB · Views: 108
 -
 Autofill6.png180.2 KB · Views: 98
 -
 im 2.png224.1 KB · Views: 103
 -
 im 3.png213.3 KB · Views: 97
 -
 im 7.png125.6 KB · Views: 99
 -
 im 6.png107.4 KB · Views: 104
Last edited: