Create Connection In Pabbly Hook
The "Create Connection" feature allows users to add new connections within the selected folder to better manage integrations and events. Below is the complete guide to using this feature.


Create Folder In Pabbly Hook
The "Create Folder" feature allows users to organize their connections into folders for better management. Below is the detailed documentation for this functionality.


Rename Folder In Pabbly Hook
If you're trying to rename a folder in Pabbly Hook, here's a quick guide to help you:

Move to Folder In Pabbly Hook
The "Move to Folder" feature allows users to organize connections by transferring them from one folder to another. This is especially useful for maintaining a structured and efficient workflow.


Managing Connections in Pabbly Hook


The "Create Connection" feature allows users to add new connections within the selected folder to better manage integrations and events. Below is the complete guide to using this feature.
Feature Overview
The "Create Connection" dialog box enables users to:- Name the connection to identify it uniquely.
- Select a folder where the connection will be created, enabling better organization.
Steps to Create a Connection
- Access the "Create Connection" Dialog:
- Click the "Create Connection" button located at the top-right corner of the Connections page.
- Enter Connection Name:
- In the "Connection Name" input field, type the desired name for your connection.
- A help text below the input field provides guidance:
"Enter the name of the connection."
- Select a Folder:
- Use the "Select Folder" dropdown to choose a folder where the connection will be created.
- By default, the Home folder is pre-selected.
- Help text below the dropdown offers additional information:
"Select the folder or subfolder where you want to create the connection."
- Create the Connection:
- Once all fields are filled in, click the "Create" button to finalize and add the connection.
Field Descriptions
- Connection Name:
- Required: This field cannot be empty.
- Validation: The connection name must be unique within the same folder.
- Select Folder:
- Required: You must specify a folder for the connection.
- Use the dropdown to choose the desired folder or subfolder.
Validation and Error Handling
- If the Connection Namefield is empty:
- An error message will be displayed prompting the user to provide a connection name.
Best Practices
- Use clear and descriptive connection names to make it easier to identify integrations.
- Organize connections into relevant folders for better management and faster access.
- Regularly review and update connections to maintain an efficient workflow.
Create Folder In Pabbly Hook
The "Create Folder" feature allows users to organize their connections into folders for better management. Below is the detailed documentation for this functionality.
Feature Overview
The "Create Folder" dialog box enables users to:- Enter a folder name for the new folder they wish to create.
- Select a parent folder (optional) to nest the new folder within an existing one.
Steps to Create a Folder
- Access the "Create Folder" Dialog:
- Click on the "+" button located in the Folders section on the left panel.
- Enter Folder Name:
- In the "Folder Name" input field, type the desired name for the new folder.
- A help text below the input field provides additional guidance:
"Enter the name of the folder here".
- Select Parent Folder (Optional):
- Use the dropdown menu labeled "Select Parent Folder" to choose an existing folder as the parent folder.
- If no parent folder is selected, the new folder will be created at the root level.
- The help text below the dropdown provides additional guidance:
"Select the parent folder where you want to create the folder".
- Use the dropdown menu labeled "Select Parent Folder" to choose an existing folder as the parent folder.
- Create the Folder:
- Click the "Create Folder" button to finalize and add the folder.
Field Descriptions
- Folder Name:
- Required: This field must not be empty.
- Validation: Users are required to input a unique folder name. Duplicate folder names in the same level are not allowed.
- Parent Folder:
- Optional: Selecting a parent folder is not mandatory.
- If left empty, the folder will be created at the root level.
Validation and Error Handling
- If the Folder Namefield is empty:
- An error message will be displayed prompting the user to enter a folder name.
- If an invalid action is attempted:
- Relevant error notifications will appear to guide the user.
Best Practices
- Use clear and descriptive folder names to enhance organization.
- Regularly organize folders and subfolders to keep your workspace tidy.
Rename Folder In Pabbly Hook
If you're trying to rename a folder in Pabbly Hook, here's a quick guide to help you:
Steps to Rename a Folder:
- Go to the Connections page.
- In the Folders section on the left, locate the folder you want to rename.
- Click on the three dots (options) menu next to the folder.
- Select the Rename option.
- A pop-up will appear, allowing you to enter the new folder name.
- Enter the new name and click the Rename button to save changes.
Notes:
- Ensure the folder name is unique and meaningful to organize your connections better.
- If you encounter any errors while renaming, verify that the new name meets any character or length restrictions.
Help Tooltip:
In the rename dialog, there's a tooltip: "You can rename the folder from here. Learn more." Click Learn More for additional information or troubleshooting tips.Move to Folder In Pabbly Hook
The "Move to Folder" feature allows users to organize connections by transferring them from one folder to another. This is especially useful for maintaining a structured and efficient workflow.
Feature Overview
The "Move to Folder" dialog box enables users to:- Select one or more connections.
- Move the selected connections to a target folder or subfolder.
Steps to Move Connections
- Select Connections:
- On the Connections page, check the boxes next to the connections you want to move.
- Access the "Move to Folder" Dialog:
- Click the "Select Action" dropdown in the top-right section.
- Choose "Move to Folder" from the dropdown options.
- Select Target Folder:
- In the "Select Folder" dropdown within the dialog, choose the folder where you want to move the selected connections.
- By default, the current folder is pre-selected.
- Move Connections:
- Click the "Move" button to confirm the action and transfer the selected connections to the chosen folder.
Field Descriptions
- Select Folder Dropdown:
- Lists all available folders and subfolders in your workspace.
- Validation: A target folder must be selected before proceeding.
Validation and Error Handling
- If no connections are selected:
- The "Move to Folder" dialog will not open.
- If a selected connection is already in the target folder:
- The system will handle this gracefully, and no duplicate action will occur.
Best Practices
- Use the "Move to Folder" feature regularly to maintain an organized structure.
- Confirm the selected folder to ensure connections are placed correctly.
- Avoid keeping all connections in a single folder, as this can lead to clutter.
Managing Connections in Pabbly Hook
1. Enabling a Connection
What is an Enabled Connection?
An enabled connection is active and ready to process requests or events as configured. Ensure the connection is enabled to make it functional.Steps to Enable a Connection:
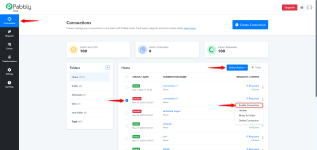
- Go to the Connections section from the left navigation menu.
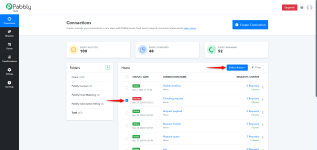
- Locate the connection that is currently Inactive. Inactive connections are displayed with a red "Inactive" label.
- Select the checkbox next to the connection you wish to enable.
- Click on the "Select Action" button at the top-right of the page.
- From the dropdown menu, click "Enable Connection".
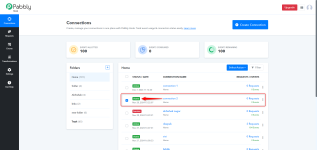
- The connection will now display a green "Active" label, indicating it is enabled and operational.
2. Disabling a Connection
What is a Disabled Connection?
A disabled connection is inactive and will not process requests or events until re-enabled. Disable connections when they are no longer needed or require temporary suspension.Steps to Disable a Connection:
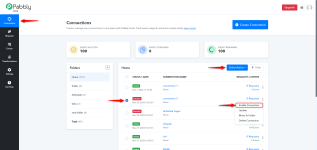
- Go to the Connections section from the left navigation menu.
- Locate the connection that is currently Active. Active connections are displayed with a green "Active" label.
- Select the checkbox next to the connection you wish to disable.
- Click on the "Select Action" button at the top-right of the page.
- From the dropdown menu, click "Disable Connection".
- The connection will now display a red "Inactive" label, indicating it is disabled and will no longer function until re-enabled.
Attachments
Last edited:


