In Pabbly Hook, a feature that allows users to set rate limit for their connections. This feature is available exclusively for maximum number of webhook triggers . Here, we will guide you through the steps to set the rate limit for your connections.
What is a Rate Limit?
A rate limit is a control mechanism used to restrict the number of requests or actions that a system can handle within a specific time frame. In the context of APIs, webhooks, rate limiting helps manage the flow of incoming requests, preventing overload and ensuring fair resource usage.
For example, if a rate limit is set to "1 request per minute," it means only one request will be processed every minute, while additional requests may be delayed, queued, or even rejected until the time limit resets.
Setting Up a 1-Minute Rate Limit for Webhooks in Pabbly
This guide walks you through setting a 1-minute rate limit on a webhook connection in Pabbly Hook. With this configuration, only one webhook event will be sent per minute, helping you control the rate at which your system processes incoming messages.
Note: Any requests beyond the limit will be queued or held back until the next available interval, ensuring that the rate limit of 1 per minute is maintained.
What is a Rate Limit?
A rate limit is a control mechanism used to restrict the number of requests or actions that a system can handle within a specific time frame. In the context of APIs, webhooks, rate limiting helps manage the flow of incoming requests, preventing overload and ensuring fair resource usage.
For example, if a rate limit is set to "1 request per minute," it means only one request will be processed every minute, while additional requests may be delayed, queued, or even rejected until the time limit resets.
Setting Up a 1-Minute Rate Limit for Webhooks in Pabbly
This guide walks you through setting a 1-minute rate limit on a webhook connection in Pabbly Hook. With this configuration, only one webhook event will be sent per minute, helping you control the rate at which your system processes incoming messages.
Step 1: Navigate to Create Connection
- Go to the Pabbly Hook section where your webhook connection is configured while clicking create connection and select the required fields.
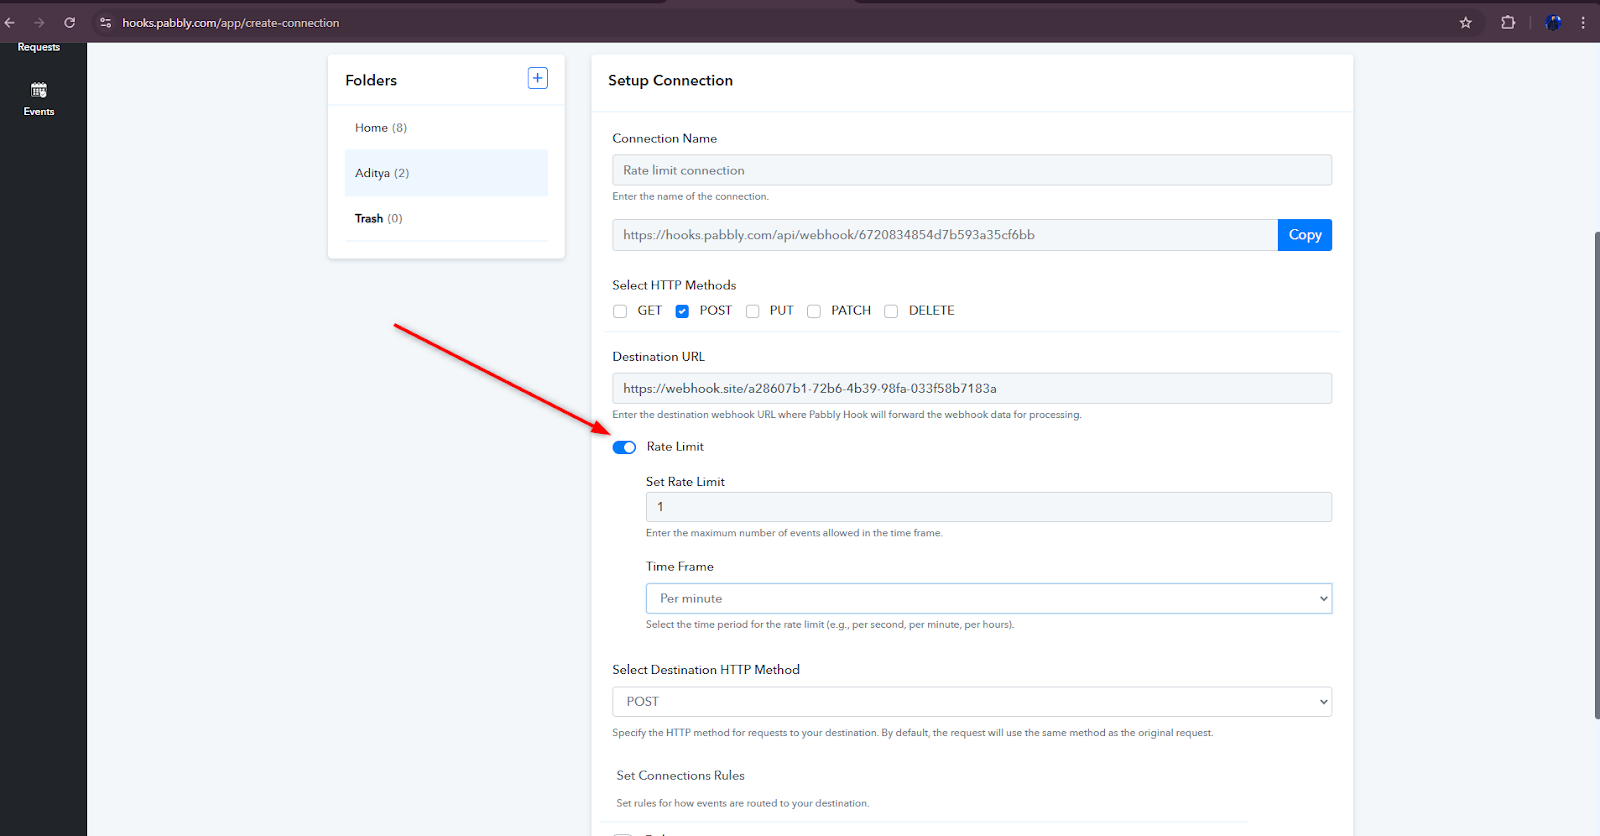
Step 2: Access Rate Limit Configuration
- In the selected webhook connection, look for the Rate Limit section.
- Choose the 1 Minute option to set the rate limit interval. This setting means that only one webhook request will be sent per minute.
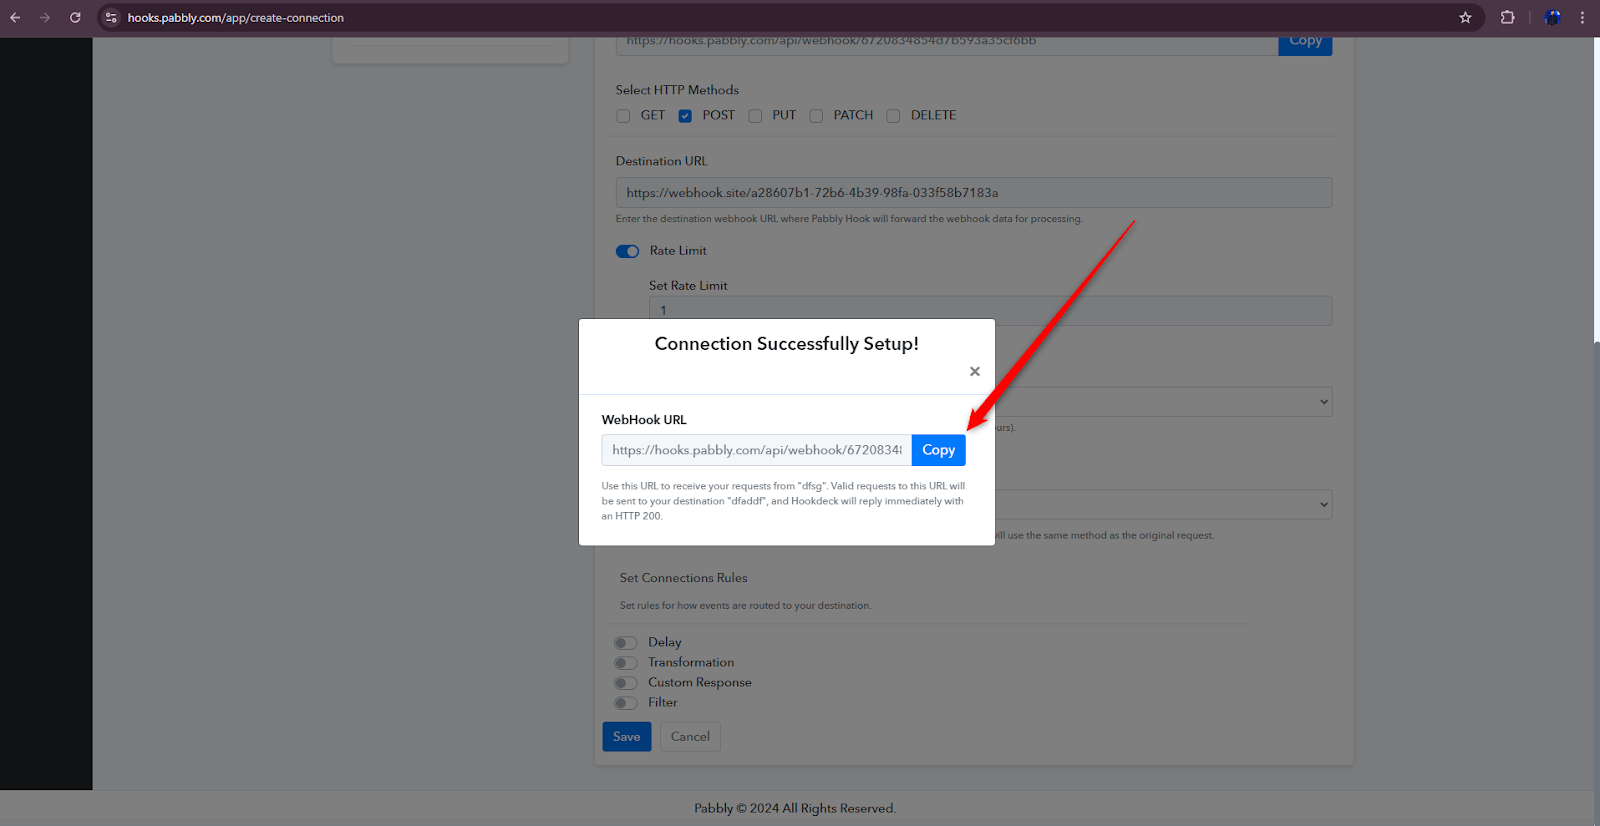
- After configuring all required fields, save the connection. Once saved successfully, copy the webhook URL from the dialog box.
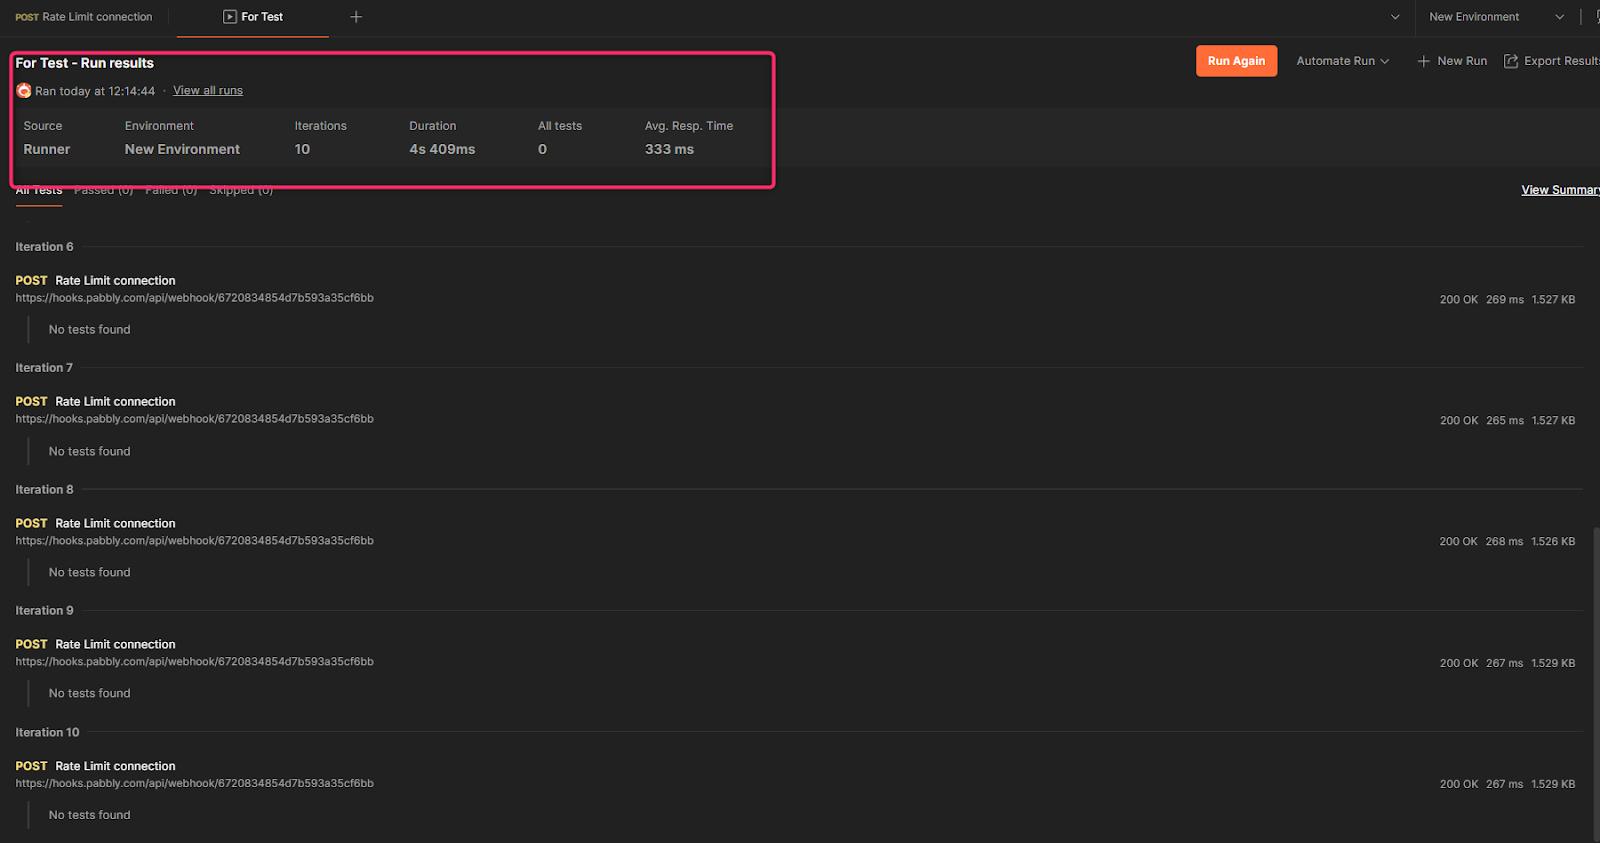
Step 3: Testing the Rate Limit
To see the rate limit in action, you can perform a test by sending multiple webhook events in quick succession.- Use a loop or iteration method to send, for example, 10 webhook requests.
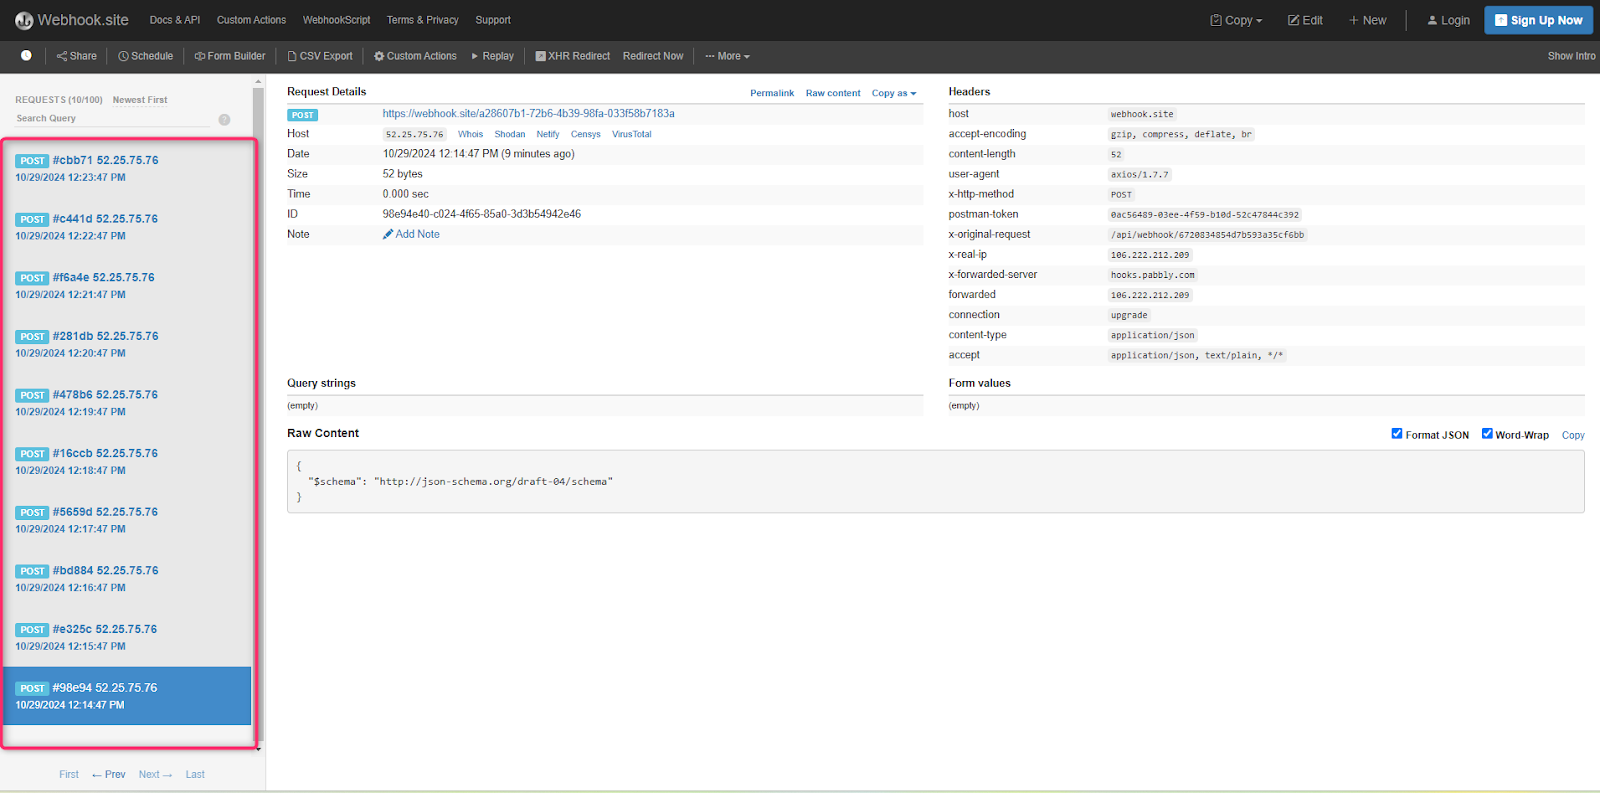
- With the 1-minute rate limit applied, you will see only one webhook being processed per minute.
Note: Any requests beyond the limit will be queued or held back until the next available interval, ensuring that the rate limit of 1 per minute is maintained.