Working of Pabbly Subscription Billing
Pabbly Subscriptions is the best-in-class subscription management and billing services software. It has some amazing features that will make the management of your customer’s subscription, a matter of a few clicks.This page serves as the guide to set up your Pabbly Subscriptions account.
To setup your account, follow the below steps:
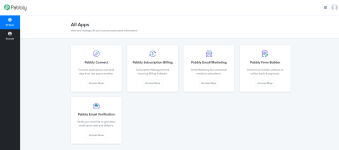
1. You can log in to your Pabbly account from here- https://payments.pabbly.com/signin2. Logging into your account will redirect to All Apps page:
3. As you click on 'Access Now' you will be redirected to Pabbly Subscription Billing homepage, and here you have to setup your account by entering the following details like Company Name, Currency and phone number. All these fields are mandatory.
4. How To Integrate Payment Gateway In Pabbly Subscription Billing Account?
After entering the above details you will have to enable the 'Test Payment Gateway'. Please note this is only for test payments and not real payments.
For real payments you can Integrate Payment Gateways as per your requirement and preference to collect online payments from your customers. In Pabbly Subscription Billing you have option to integrate around 30 plus payment gateways. Apart from that, you can add any payment gateway by using the custom payment feature.
5. Process To Create Products And Plans
After integrating your default payment gateway, you have to create products and their subsequent plans/subscriptions.
Click on 'Add New Product' and enter the product name as per your requirement,
After entering the product name your product will be created successfully
Now, you will have to create the Plan under the product you have created before this step. Click on 'Add new Plan'.
As you Click on 'Add new Plan' the add plan page will open where you have to enter the details of your plan like Plan name, Plan code, currency etc.
The plan page consists of many details so, please refer to the below screenshot for rest of the details:
After entering all the details, you will get the plan checkout link which you can share with your customers, with which they can easily buy your products and services.
The added TEST Plan will be displayed under the product which we have created earlier:
6. How To Sell Products And Collect Payments?
Since the product and plans are created you will get a unique checkout page for every individual plan. You can send the checkout page link to your customer or embed the checkout page on your website.
Whenever a customer decides to buy your product or avail your services through your shared “Buying Links”, a “Default” checkout page will appear
As the customer completes the payment process after successful payment, he will get subscribed to your services and will receive a thank you message as shown:
This is how you can setup your account and if you still have any query feel free to reach out to us.
Attachments
Last edited by a moderator: