Contact custom fields let you add extra information about your contacts in Pabbly Chatflow. Besides the usual details like name and phone number, you can create your own fields to store things like “Lead Source” or “Favorite Product.” This helps you organize and use contact info better.
Follow these steps to define and manage custom contact fields for storing contact values inside your Pabbly Chatflow account.
Note: These default fields are used internally in contacts and messages, but they are not accessible inside Flows. In Flows, only newly created custom contact fields will be available for dynamic mapping and automation logic.


A trash icon will appear for any newly added custom field, allowing you to delete it if needed.


Follow these steps to define and manage custom contact fields for storing contact values inside your Pabbly Chatflow account.
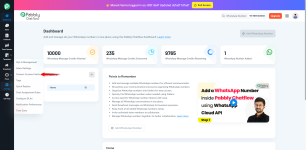
Step 1: Log in to Your Pabbly Chatflow Account
Access your Pabbly Chatflow dashboard by signing in with your credentials.Step 2: Navigate to Contact Custom Fields
- Go to the Settings module.
- In the navigation panel, click on Contact Custom Fields.
Step 3: View and Edit Existing Fields
You will see default fields such as:- Name
- MobileNumber
- LastName
- FirstName
Note: These default fields are used internally in contacts and messages, but they are not accessible inside Flows. In Flows, only newly created custom contact fields will be available for dynamic mapping and automation logic.
Step 4: Add a New Custom Field
Click on the + Add More Field link to create a new field.- Field Name: Should be written without spaces (e.g., LeadSource, PreferredProduct)
- Field Description: A short description to help identify its purpose (e.g., “Source from where the lead came”).
A trash icon will appear for any newly added custom field, allowing you to delete it if needed.
Step 5: Save Changes
After adding or editing fields, click the Save button to apply your changes.Attachments
Last edited: