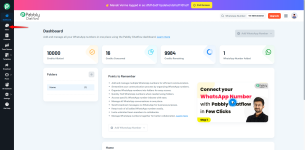
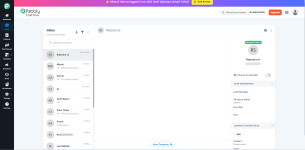
The Inbox module in Pabbly Chatflow is your central workspace for managing real-time WhatsApp conversations. It allows team members to respond to customer messages, assign chats, track message history, and collaborate efficiently — all in one place.
The Inbox is where your team can:


The Chat Filter allows you to organize and sort your chats based on several important conditions, which helps you stay efficient and prioritize the right conversations.


The Inbox is where your team can:
- View all WhatsApp chats (assigned, unassigned, open, closed).
- Respond using plain text, media, or WhatsApp templates.
- Assign conversations to teammates or teams.
- Tag and organize chats using custom labels.
- Add and manage contact details.
- Trigger workflows or send quick replies — instantly.
Step 1: Access the Inbox
- Log in to Pabbly Chatflow.
- Navigate to the Inbox from the sidebar.
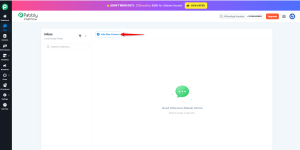
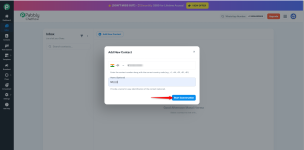
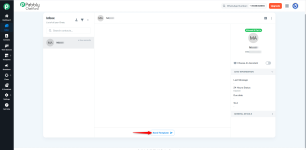
Step 2: Add a New Contact
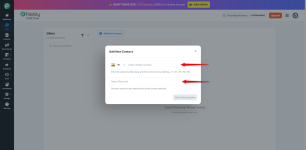
Before starting any conversation, you need to add the contact.- Click + Add New Contact.
- Enter the WhatsApp number (with correct country code like +91, +1, etc.).
- Optionally, enter a name for easy identification.
- Click Start Conversation.
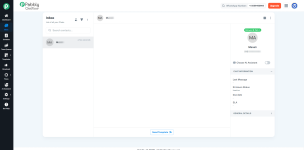
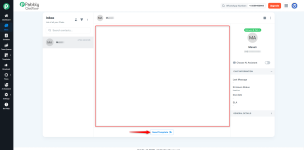
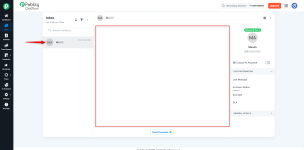
Step 3: Open the Chat
- Once the contact is added, it appears in the left chat list.
- Click on the contact to open the chat view.
Step 3: Open the Chat
- Important Note:
For newly added contacts who haven’t initiated a conversation, you must start the interaction with a pre-approved WhatsApp template message. - When you open a chat with a newly added contact, you will see a “Send Template” button instead of the regular message box.
- Click Send Template to open the list of templates you have created in the Templates module.
- If you have no custom templates created, the default template provided by Meta will be automatically available in the list.
- This default template is provided by Meta and is ready for use.
- Select the appropriate template from the list to initiate the conversation.
- If you want to create your own templates for future use, go to the Templates module and add custom templates. Once approved by Meta, they will be available in the Send Template dropdown.
- After sending the first template, if the customer replies, a 24-hour session opens and you can continue the conversation with free-form messages.
Step 5: After the Conversation Starts (or Customer Replies)
Once the customer replies, or you send a template, the full conversation interface becomes available, and additional communication options appear- Quick Replies
- Use Quick Replies for commonly used responses (e.g., “Thank you for contacting us!”).
- Type / (slash) to access available quick replies or select them from the dropdown list.
- You can easily create and manage these replies for faster and standardized responses.
- Text Formatting Options
- Format your text using bold, italic, or strikethrough to highlight key information.
- Format your text using bold, italic, or strikethrough to highlight key information.
- Send Media Files
- Click the attachment icon to choose and send various types of media:
- Text
- Allows you to compose a plain text message.
- Simply type your message in the text input box.
- Image
- Add a caption along with the image.
- You can:
- Upload an image directly from your system.
- Or provide an image URL.
- Size Limit: Less than 5MB
- Accepted Formats: .png, .jpeg
Video
- Add a caption to accompany your video.
- You can:
- Upload a video from your system.
- Or provide a video URL.
- Size Limit: Less than 16MB
- Accepted Formats: .mp4
Audio
- Add an optional caption with the audio file.
- You can:
- Upload an audio file directly.
- Or provide a URL to the audio.
- Size Limit: Less than 16MB
- Accepted Formats: .mp3
File
- Upload general-purpose files such as PDFs, documents, or spreadsheets.
- No preview is sent; users receive a downloadable file.
- Size Limit: Typically follows WhatsApp limits (recommended < 16MB).
- Common Formats: .pdf, .docx, .xlsx, .txt
- Send Emojis
- Click the emoji icon on the input bar to open a list of emojis.
- Use emojis to add personality and engagement to your responses.
Right Sidebar Features:
1. Chat Information
- Last Message: View the latest message from the customer.
- 24 Hours Status: Shows the current status of the chat (Active or Inactive).
- Due Date: This is set based on your SLA and shows when the response is due.
- SLA: If an SLA is configured, it will appear here, showing the expected response time.
2. Contact Custom Fields
- Here, you can add or view additional details specific to the contact.
- These can include custom data such as Location, Order ID, Membership Level, etc.
- Custom fields help you keep track of important customer information and improve your responses.
3. General Details
This section provides vital options to manage the ownership and details of the conversation:- Chat Owner: You can assign or change the Chat Owner(the person responsible for replying) directly from this section.
- Click to assign or change the owner to another team member or yourself.
- If the chat is currently unassigned or needs to be re-assigned, you can use this option to delegate the chat to the correct team member.
- Tags: Add tags to help categorize chats based on customer type, urgency, or any other internal metrics (e.g., “High Priority,” “Sales Lead”).
- Incoming Status: Displays whether the chat is allowed or blocked by WhatsApp, helping you manage active communication lines.
- User Status (Opt-In/Opt-Out):
- Opt-In: The customer has given explicit consent to receive messages from your business.
- Opt-Out: The customer has opted out, and no further messages can be sent to them unless they opt back in.
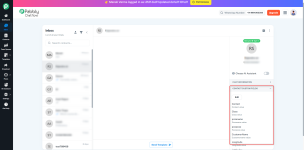
Chat Filter: Sorting and Organizing Chats
The Chat Filter allows you to organize and sort your chats based on several important conditions, which helps you stay efficient and prioritize the right conversations.
- Created At: Filter chats based on the creation date (from and to date).
- Opted In: Filter based on whether the contact has opted in or not (Yes/No).
- Incoming Blocked: Filter based on whether the contact’s WhatsApp messages are blocked (Yes/No).
- Read Status: Filter chats by whether they are marked as Read, Unread, or All.
- Contact Custom Fields: Filter chats based on custom field values, such as Location, Customer Type, etc.
Key Features and Capabilities
1. Real-Time Chat View
- See all incoming WhatsApp messages instantly.
- Conversations are organized in a left-hand column and open in the main chat panel when clicked.
2. Reply Using Text, Media & Templates
- Type responses manually or use:
- Pre-approved WhatsApp templates (e.g., “Order confirmation”).
- Quick Replies for repetitive messages.
- Media attachments (images, documents, audio, video).
3. Chat Assignment & Ownership
- Assign a chat to yourself, a teammate, or a team.
- If Round Robin is enabled for the team, new chats are auto-distributed.
- Reassign chats if workloads change or escalation is needed.
4. Customer Information Panel
- On the right side of the screen, view:
- Customer name and number.
- Tags and labels.
- Custom contact fields (like location, email, or order ID).
5. Status Tracking
- Use status indicators like:
- Open
- On Hold
- Replied
- Pending
- Resolved
- Closed
8. Message Logs and History
- Every action and message is logged chronologically.
- You can track when a chat was opened, replied to, or assigned.
Attachments
-
 1746083481520.png282.8 KB · Views: 7
 -
 1746083832868.png161.9 KB · Views: 5
 -
 1746084731987.png130 KB · Views: 5
 -
 1746085101056.png150.9 KB · Views: 5
 -
 1746085205231.png150.4 KB · Views: 5
 -
 1746086008183.png90.7 KB · Views: 5
 -
 1746086065361.png95.3 KB · Views: 5
 -
 1746086428954.png95.6 KB · Views: 5
 -
 1746086694801.png94.8 KB · Views: 5
 -
 1746086861355.png96.3 KB · Views: 5
 -
 1746086934090.png95.6 KB · Views: 5
 -
 1746096745312.png201.6 KB · Views: 5
Last edited: