You can add the Razorpay payment gateway with your Pabbly Subscriptions account in a simple and easy way. All you have to do is to follow the steps to add & activate the Razorpay payment gateway.
First, let's understand the difference between Razorpay Onetime and Razorpay Subscription.
Razorpay Onetime:
It has been integrated by using Oauth with the Pabbly app associated with Razorpay. It is a kind of Partnership. The purpose of this integration is, some of our users face 'Registered domain unverified' issues while making payments. And also Razorpay says your users will get a transaction fee discount while making payment through UPI but some of our users complain they didn't get a transaction discount.
Razorpay Subscription:
The purpose of this integration is to help our users to get auto-charge payments from Razorpay subscriptions. But while doing this using OAuth, there are some issues like recurring subscriptions are not created inside the user's account. So we replaced the integration with the API key and secret key method. This method allows creating subscriptions inside users' accounts. So that our users can manage their subscriptions by themself.
Follow These Guidelines To Integrate Razorpay Onetime In Your Account:
1. Just go to Settings and click on Payment Gateway Integration.
2. Then click on the ‘Connect Now’ button next to “Razorpay Onetime” under the Payment Gateway Name tab.

3. Once you click on the ‘Connect Now’ button next to Razorpay, it will redirect you to the Razorpay login window.
4. Fill in your Razorpay login credentials and click on ‘Log In’.

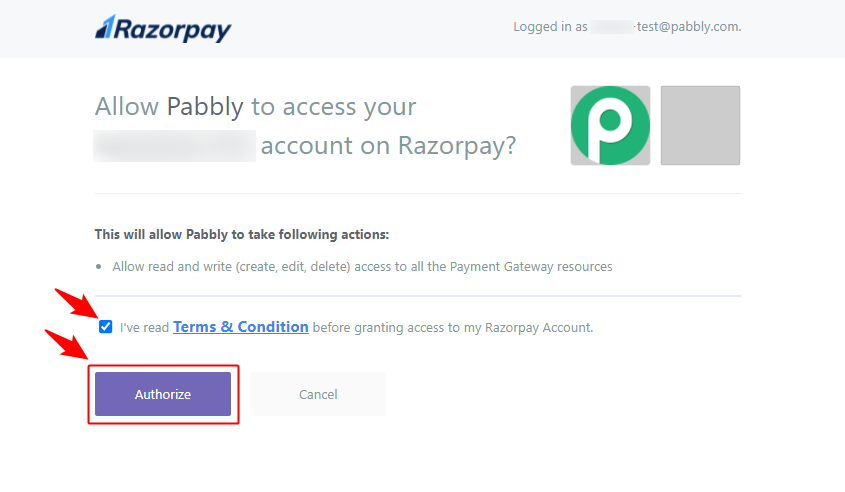
5. Next, an authorization window will appear, select the ‘Terms & Condition’ checkbox and click on the ‘Authorize’ button.

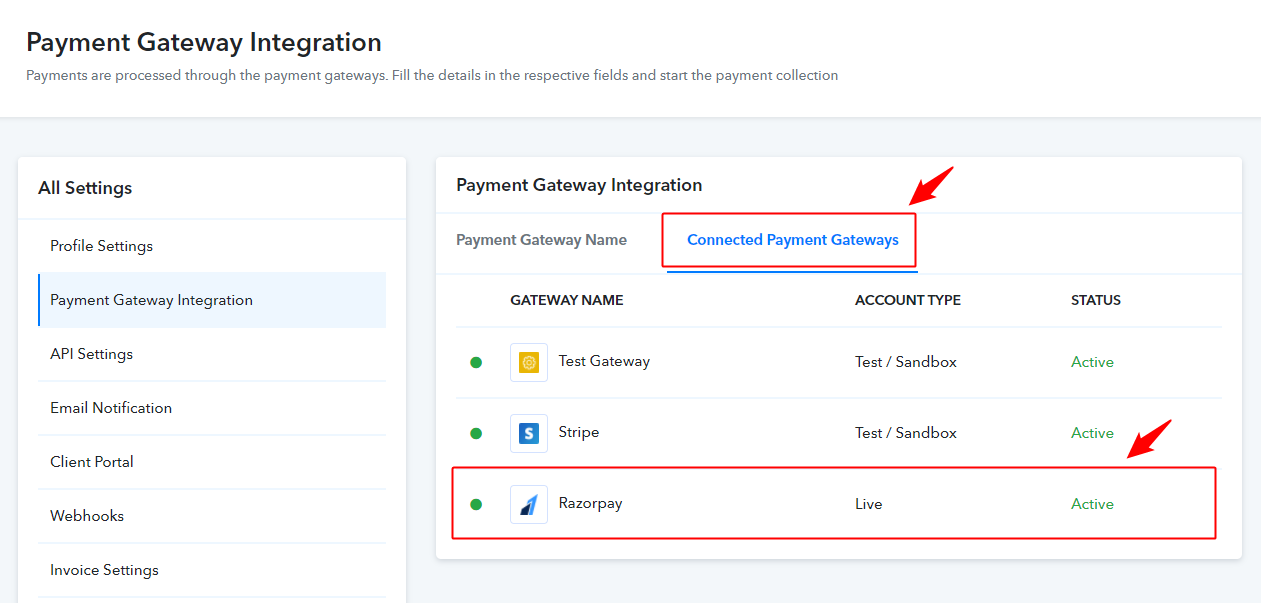
6. Now, your Razorpay payment gateway integration is successfully completed and the status of your payment gateway will be shown “Active”.

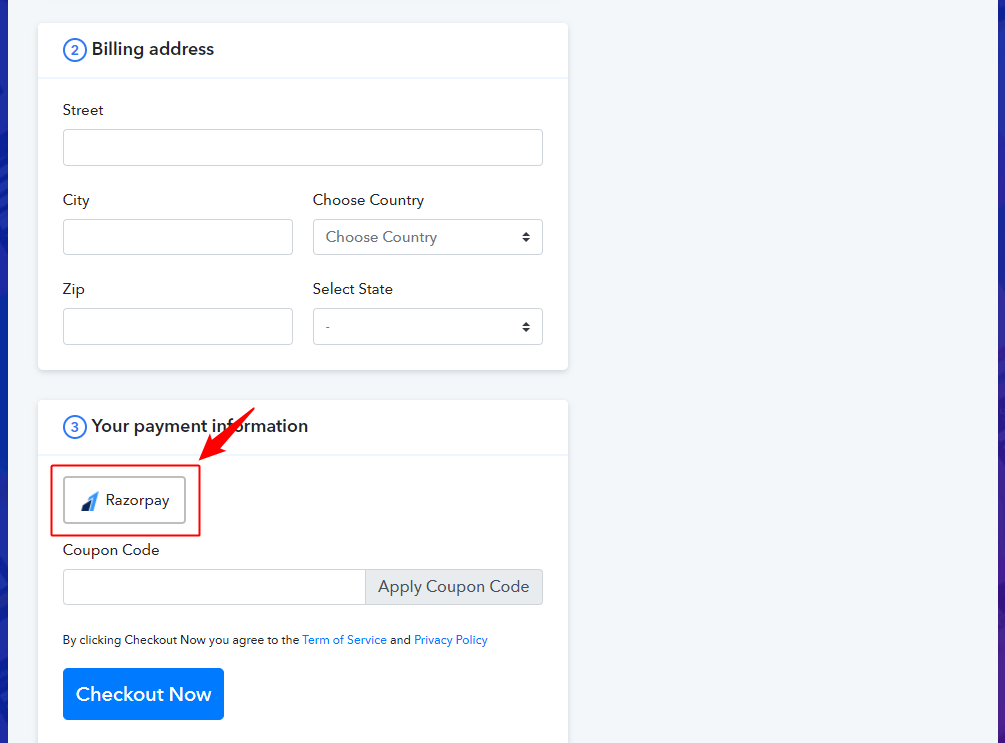
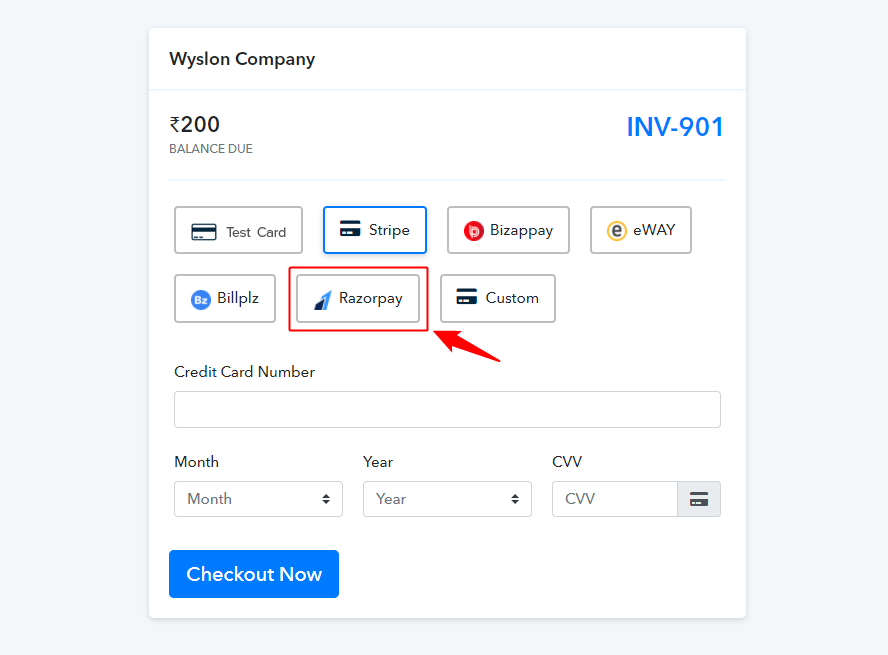
The Razorpay payment option on the checkout and on other payments page will look like:


Your customer will be redirected to the Razorpay servers to complete the payment. Once the processing is completed the customer will get to the default thank you page of Pabbly Subscriptions.
Please login into your account and check the integration for a better understanding.
Follow These Guidelines To Integrate Razorpay Payment Gateway for Recurring Payments:
These steps are prerequisites and you’ll need to activate the settings before any payment processes. After activating this setting, you’ll end up accepting recurring payments from your customers via the Razorpay payment gateway.
1. Just go to Settings and click on Payment Gateway Integration.
2. Then click on the ‘Connect Now’ button next to “Razorpay Subscription” under the Payment Gateway Name tab.

3. Add the gateway key ID and Secret key, then hit submit.

4. As you Login, To generate the Key ID and Key Secret click on the settings -> API Keys -> Regenerate Key button, as shown in the image below.

5. This will generate the Key ID and Key Secret as shown below:

6. Now, you have to copy the Key ID and Key Secret and paste it in the Pabbly Subscription Billing account to connect the RazorPay account with Pabbly Subscription Billing. Please refer to the below screenshot.

The integration is completed. Now, you need to set up the webhooks inside your Razorpay account to sync your recurring subscription payments with PSB subscriptions.
To setup webhooks in your Razorpay account, go to Settings -> Webhooks -> Add new webhook.
Use the following webhook URL:
Here is the step-by-step video tutorial to help you setup Razorpay integration to Receive Recurring Payments:
First, let's understand the difference between Razorpay Onetime and Razorpay Subscription.
Razorpay Onetime:
It has been integrated by using Oauth with the Pabbly app associated with Razorpay. It is a kind of Partnership. The purpose of this integration is, some of our users face 'Registered domain unverified' issues while making payments. And also Razorpay says your users will get a transaction fee discount while making payment through UPI but some of our users complain they didn't get a transaction discount.
Razorpay Subscription:
The purpose of this integration is to help our users to get auto-charge payments from Razorpay subscriptions. But while doing this using OAuth, there are some issues like recurring subscriptions are not created inside the user's account. So we replaced the integration with the API key and secret key method. This method allows creating subscriptions inside users' accounts. So that our users can manage their subscriptions by themself.
Follow These Guidelines To Integrate Razorpay Onetime In Your Account:
1. Just go to Settings and click on Payment Gateway Integration.
2. Then click on the ‘Connect Now’ button next to “Razorpay Onetime” under the Payment Gateway Name tab.
3. Once you click on the ‘Connect Now’ button next to Razorpay, it will redirect you to the Razorpay login window.
4. Fill in your Razorpay login credentials and click on ‘Log In’.
5. Next, an authorization window will appear, select the ‘Terms & Condition’ checkbox and click on the ‘Authorize’ button.

6. Now, your Razorpay payment gateway integration is successfully completed and the status of your payment gateway will be shown “Active”.

The Razorpay payment option on the checkout and on other payments page will look like:


Your customer will be redirected to the Razorpay servers to complete the payment. Once the processing is completed the customer will get to the default thank you page of Pabbly Subscriptions.
Please login into your account and check the integration for a better understanding.
Follow These Guidelines To Integrate Razorpay Payment Gateway for Recurring Payments:
These steps are prerequisites and you’ll need to activate the settings before any payment processes. After activating this setting, you’ll end up accepting recurring payments from your customers via the Razorpay payment gateway.
1. Just go to Settings and click on Payment Gateway Integration.
2. Then click on the ‘Connect Now’ button next to “Razorpay Subscription” under the Payment Gateway Name tab.
3. Add the gateway key ID and Secret key, then hit submit.
4. As you Login, To generate the Key ID and Key Secret click on the settings -> API Keys -> Regenerate Key button, as shown in the image below.
5. This will generate the Key ID and Key Secret as shown below:
6. Now, you have to copy the Key ID and Key Secret and paste it in the Pabbly Subscription Billing account to connect the RazorPay account with Pabbly Subscription Billing. Please refer to the below screenshot.
The integration is completed. Now, you need to set up the webhooks inside your Razorpay account to sync your recurring subscription payments with PSB subscriptions.
To setup webhooks in your Razorpay account, go to Settings -> Webhooks -> Add new webhook.
Use the following webhook URL:
And Select the following Active events:
payment.failed
payment.captured
subscription.charged
subscription.authenticated
subscription.cancelled
subscription.paused
subscription.resumed
subscription.activated
refund.created
refund.processed
refund.failed
Here is the step-by-step video tutorial to help you setup Razorpay integration to Receive Recurring Payments:
Last edited by a moderator:
